How to Grow Weed: What Master Growers Don’t Tell Beginners
The journey from seed to harvest takes 4 to 8 months when growing weed, yet many beginners dive in without knowing the basics. Cannabis cultivation follows a predictable four-phase lifecycle: germination, seedling, vegetation, and flowering, though master growers make it appear simple.
Growing weed from seed is more available than ever today, especially with autoflowering strains that yield harvests in just eight weeks. But successful indoor growing demands specific conditions – temperatures around 27°C (80°F) and humidity levels between 40-60%. Our years of experience have helped us perfect these techniques, and we’ll share the hidden secrets about growing cannabis that most experts rarely discuss in this piece.
This detailed guide explains everything you need to know about growing pot. You’ll learn to select the right seeds and time your harvest perfectly. The guide covers indoor and outdoor growing methods that help you avoid common pitfalls while getting the most from your plants.
The Truth About Growing Weed That No One Tells You
“The biggest killer on the planet is stress, and I still think the best medicine is and always has been cannabis.” — Willie Nelson, Country music legend and cannabis advocate
The truth about growing cannabis might surprise you – it’s a plant that naturally wants to thrive. Many expert growers keep an air of mystery around cultivation, but underneath the complex terminology and specialized equipment lies a simple process. My experience helping thousands of first-time growers has shown what really matters and what doesn’t.
Why growing cannabis is easier than you think
Cannabis got its nickname “weed” for good reason – the plant grows vigorously with minimal intervention when conditions are right. The plant shows remarkable resistance to many common problems like mold. You don’t need complex feeding schedules to grow cannabis successfully, despite what specialty growing forums suggest. Simple nutrients help these plants flourish.
New growers often overthink things and buy expensive equipment they don’t need. Most problems stem from doing too much rather than too little – especially when you have overfeeding and overwatering issues. New growers believe their plants need constant attention, but this extra “love” can damage your plants.
The simplicity secret: Cannabis follows a predictable life cycle as it moves from germination through vegetation to flowering. The basic contours of this pattern create your roadmap to success. Quality cannabis grows well with simple nutrients, good light, and patience – no specialized knowledge needed.
Modern autoflowering strains have improved so much in potency that this is a big deal as it means that they match (and sometimes outperform) more complex photoperiod strains. These plants make growing more available to beginners since they flower automatically, which removes one of cultivation’s trickiest aspects.
The real challenges beginners face
In stark comparison to this popular belief, new growers struggle more with avoiding basic mistakes than becoming skilled at advanced techniques. One experienced grower puts it well: “I’m not ashamed to admit that my first few grows ended in complete failure. I had some bad information, and I combined that with some over-priced products and a dash of over-zealousness”.
The most common pitfalls include:
- Information overload: Everything you need to grow cannabis exists online, but finding reliable information proves challenging. Forums can mislead you, as some people give advice without real growing experience.
- Impatience: The growing process requires waiting through different stages. Results suffer when growers check their plants too often or harvest too early.
- Overfeeding: Cannabis doesn’t need 20X more phosphorus than other plants, despite common beliefs. Too many nutrients lead to nutrient burn and give buds a chemical taste.
- Improper watering: The right watering schedule depends on many variables that require good judgment. Plants suffer severe damage from both underwatering and overwatering.
- Poor climate control: Plants need different temperature, light levels, and humidity throughout their lifecycle. Mistakes here cause stretching, mold, or stunted growth.
New growers often struggle to interpret plant signals. Leaf discoloration might point to nutrient deficiency but could also mean pH imbalance prevents nutrient absorption. Learning to understand your plants takes time.
Setting realistic expectations for your first grow
Your first grow serves best as a learning experience. You might not achieve those dense, frosted buds from magazines, but you’ll learn valuable lessons for future grows. Keep things simple – too many plants or complex techniques overwhelm new growers quickly.
Patience remains the key ingredient in cannabis cultivation. This quality helps you work through early challenges and stops premature harvesting. Taking extra days to dry and cure properly makes your final product substantially better.
Time investment reality: First grows typically take 3-5 months from planting to smoking. While autoflowering strains finish in about two months, traditional photoperiod plants need more time.
The sort of thing i love about learning curves – what seems overwhelming now becomes second nature after a harvest or two. Confusing techniques start making sense, and you develop trust in your growing abilities.
Success means completing the entire growth cycle rather than seeking perfection. Take photos and notes to track progress and spot issues. These records help tremendously with future grows and problem-solving.
Most important: Growing cannabis blends science with art. Your mistakes become the foundation of growing expertise. Each cycle helps refine your approach as you develop skills suited to your growing environment.
Setting Up Your Grow Space: The Smart Way
You don’t need to break the bank to create a good cannabis grow space. New growers often spend too much on unnecessary equipment while missing out on what really affects plant health and yield. I’ve worked with many home growers and found that making smart setup choices early helps avoid getting too pricey later.
Budget-friendly setups that work well
You just need a dedicated grow tent to set up your space. Quality cannabis grows well in closets, cabinets, or even old furniture. A closet works great for people with limited space because you can easily change it to control light and airflow. Your bathroom, basement, or garage can become a good growing area if you keep proper ventilation and temperature control.
Building your own grow space saves you money. A DIY grow tent using PVC pipes and panda film (white plastic) costs much less than retail options. You can also use an old computer tower to grow a single plant. Your space should keep temperatures between 70-85°F and humidity around 40-60%, whatever its size or location.
New growers with tight budgets can start with a complete simple setup for approximately $111. This setup has a 150w HPS grow light ($78), quality soil ($17), containers ($6), and simple nutrients ($10). While this is the minimum you need, it shows you don’t need thousands to start growing.
The bare essentials you need to start
Good cannabis growing needs fewer items than what retailers might tell you. Here are the basics you need:
- Light source: Light is vital for indoor growing since cannabis uses it for energy and growth signals. A 150w HPS light works well for 1-2 plants if you’re on a budget.
- Growing medium: Soil is the best option for beginners. It costs less and needs less technical know-how than hydroponic systems.
- Containers: Simple 3-gallon poly grow bags with saucers ($6) give good drainage and root space for young plants.
- Simple nutrients: Cannabis needs nitrogen, phosphorus, potassium, and micronutrients. Happy Frog ($10) works well as a single all-purpose fertilizer for most beginners.
- Temperature and humidity monitoring: A basic thermometer/hygrometer helps you keep the right growing environment.
Everything else—grow tents, advanced lighting systems, automated nutrient delivery—is nice to have but not essential. New growers should master these basics before buying advanced gear to save money and avoid frustration.
Money-wasting space mistakes to avoid
New growers often waste money by buying expensive equipment before understanding the basics. They also create spaces that are either too small or too large for what they can handle. Start with one or two plants and grow your setup as you learn more.
Bad ventilation causes serious problems. Plants can get mold, pests, and stunted growth without good airflow. Even basic setups need small fans for air circulation. Poor planning for power, water access, or heating/cooling can ruin a well-planned grow operation.
First-time growers often spend too much on nutrients but not enough on good soil. Quality potting mix gives cannabis plants most of what they need early on. Wrong lighting choices waste money too. HPS lights work well but run hot and use more power, while fluorescent lights help seedlings but aren’t strong enough for flowering.
A dirty grow space leads to preventable problems. Clean your space well before starting to prevent disease, mold, and pests that could kill your plants. This free step saves hundreds in possible losses.
Note that the best grow spaces keep things simple while working well. Put your money into things that directly help plant health instead of fancy gadgets or looks. Begin with the basics, learn as you grow, and upgrade based on what challenges you face.
Seed Selection Secrets: How to Grow Weed from Seed Successfully
Quality seeds with the right genetics are the foundation of a successful cannabis grow. Your first step can make or break your entire harvest. Experienced growers know a few secrets about picking and germinating cannabis seeds that they don’t usually share with newcomers.
Choosing beginner-friendly strains
New growers should start with strains that have lower THC and higher CBD content. These plants are easier to grow and won’t overwhelm first-time users. Cherry Wine works great as a starter strain with its moderate CBD content, making it perfect for newcomers to cannabis cultivation. Harlequin gives excellent medical benefits without getting you high due to its very low THC levels.
Charlotte’s Web stands out as one of today’s best CBD options for beginners. If you want to try THC-dominant strains, start with varieties that have lower concentrations. Monster Cookies gives you a gentle introduction with moderate THC levels, while Hash Plant delivers a relaxing experience with approximately 12% THC – just right for new growers.
Autoflowering strains have gotten much better over the last several years. These plants are great for beginners because they flower automatically and grow faster than traditional photoperiod plants.
How to spot quality seeds
You can learn about seed viability by looking at them before planting. Dark colored seeds usually sprout better, while pale green or white ones often fail. You should still plant slightly damaged dark seeds as they might grow just fine.
The best seeds look plump and healthy with “tiger stripes” on their shells. Bigger seeds usually grow into stronger plants that yield more. Fresh seeds work best – look for ones harvested in the last year since older seeds don’t sprout as well.
Don’t worry too much if seeds feel soft between your fingers. One experienced grower says, “Some of the best plants I have ever grown have emerged from seeds that were flimsy and could be crushed between my fingers”. Any seed that sprouts proves itself worthy.
Germination tricks master growers use
Seeds need three basic things to sprout: warmth, moisture, and darkness. Many growers use the paper towel method – put seeds between damp (not soaking) paper towels at 22-25°C (71-77°F). The white taproot should reach 1-2cm before you move it to soil.
Planting straight into growing medium protects the delicate taproot. Make a 10-15mm deep hole, put the seed in with its blunt end down, and cover it loosely without pressing down. Keep the soil damp at the right temperature, and seedlings should pop up in 4-10 days.
Older cannabis seeds sprout better in a hydrogen peroxide solution. A 1% H₂O₂ mix helps about 50% of seeds sprout compared to just 10% with water. This method cleans and stimulates the seeds at the same time.
Keep humidity between 70-90% while seeds sprout. Try not to touch the seeds since their tiny root hairs break easily. Once they sprout, use fluorescent lights (Cool White code 33) and keep the growing medium damp but not wet.
The Hidden Art of Watering and Feeding
Watering and feeding cannabis is like walking a tightrope – many growers find it hard to get it right. Your harvest quality depends on how well you handle this balance. A veteran grower once told me something interesting: knowing the basics of plant nutrition and hydration matters more than following exact feeding schedules.
Why less is often more with nutrients
The nutrient amounts shown on commercial bottles are usually too strong for cannabis plants. You should cut them in half unless your plants show they need more. New growers often make the mistake of overfeeding their plants. Yes, it is true that nutrient burn happens when plants get more fertilizer than they can handle. This leads to burnt leaf tips, dark green leaves that bend upward, and smaller yields.
The nutrient truth: Plants need different nutrients as they grow. They want more nitrogen during vegetation, but flowering plants prefer higher phosphorus and potassium. Your plants’ health suffers if you don’t adjust these ratios as they mature. Starting with half the recommended dose is safer for beginners.
Your pH levels must stay balanced for nutrients to work, no matter how much fertilizer you use. The roots can’t absorb nutrients if the growing medium becomes too acidic or alkaline – growers call this “nutrient lockout.” Soil grows need a pH between 6.3-6.8, while hydroponic setups work best at 5.5-6.1.
Reading plant signals before problems appear
Cannabis plants tell you what they need if you know the signs. Yellow leaves might mean several things: not enough nitrogen, too much water, or wrong pH. Check if the pH is off before adding more nutrients.
You can spot the difference between too much and too little water by looking at the leaves:
- Too much water: Dark green leaves curl down like a “claw”
- Too little water: Limp, yellow or brown leaves that look dead
Watch where problems show up to catch nutrient issues early. Issues on top leaves usually mean mobile nutrient shortages (nitrogen, phosphorus, potassium). Problems with lower leaves point to immobile nutrient deficiencies (calcium, iron, zinc). To name just one example, yellow patches between green veins usually mean your plant needs magnesium.
The watering schedule no one talks about
Plants do better with a wet-to-dry cycle than strict watering times. Let the top 1-2 inches of soil dry out between waterings. This helps roots grow and get oxygen. Most indoor plants need water every 2-3 days, but your setup’s conditions change this timing by a lot.
The finger test works: Stick your finger an inch into the soil – water if it feels dry. Weighing pots gives you the full picture of moisture levels. Water should be 25-33% of your pot’s size to stop pooling and fungus problems.
Water your plants in the morning or evening, not during bright sunlight when water evaporates quickly. Use enough water to get 10-20% runoff if you’re adding nutrients. This extra water helps clean out salt buildup that can mess with nutrients and pH levels.
Note that giving plants slightly less water is better than too much. Plants bounce back from mild thirst within hours. Too much water creates perfect conditions for root rot – a serious problem that can kill your whole crop.
Light Management Techniques Pros Don’t Share
Professional cannabis growers know light management offers the best chance to improve yields. It’s also their biggest expense. Many experienced growers keep their lighting techniques secret. These trade secrets give them an edge over competitors.
Maximizing growth with minimal electricity
Extra light hours during vegetative growth substantially boost development speed. Most indoor growers use 18-24 hours daily (18-6 or 24-0 light schedules). This accelerates growth compared to less light. Running grow lights all the time makes electricity bills skyrocket needlessly.
You can cut costs by running lights during off-peak electricity hours, usually at night. This saves money and creates better growing conditions. Most grow rooms stay cooler at night, which creates ideal temperatures between 75-85°F (24-30°C). These conditions help maximize bud development.
Modern LED grow lights produce more cannabis while using less electricity than other options. These lights generate less heat and direct it upward instead of onto plants. This reduces cooling needs and provides focused light that increases growth and potency.
Simple light positioning tricks for bigger yields
Light placement makes a huge difference in yield quality and quantity. The right distance matters most – lights too close cause burning, while lights too far away create stretched, lanky plants that produce less.
Light gets weaker as distance grows. Professionals call this the “light footprint.” Here’s what you need to know about positioning:
- Place lights directly above plants for even coverage
- Change height based on light intensity and growth stage
- White walls or material reflect light to reach lower branches
- Larger grows need slightly overlapping lights to avoid dark spots
Getting the timing right for best results
Cannabis needs different light schedules as it grows. Plants need at least 18 hours of light daily during vegetation. The flowering phase requires 12 hours of light followed by 12 hours of complete darkness.
This 12/12 schedule mimics autumn conditions. Shorter days trigger flowering, and plants typically need 6-10 weeks before harvest. Brief light during dark periods can mess up flowering, so light-proofing your grow area is crucial.
Autoflowering strains work best with steady light schedules (usually 18/6 or 20/4). These strains don’t need schedule changes to flower.
Harvest Timing: The Make-or-Break Decision
“Cannabis will one day be seen as a wonder drug, as was penicillin in the 1940s. Like penicillin, herbal marijuana is remarkably nontoxic, has a wide range of therapeutic applications and would be quite inexpensive if it were legal.” — Lester Grinspoon, Cannabis advocate and psychiatrist
Your final product’s quality depends on choosing the right moment to harvest after months of careful growing. The right timing will affect your cannabis’s potency, flavor, and effects. Expert growers know that harvesting a few days too early or too late can change your results completely.
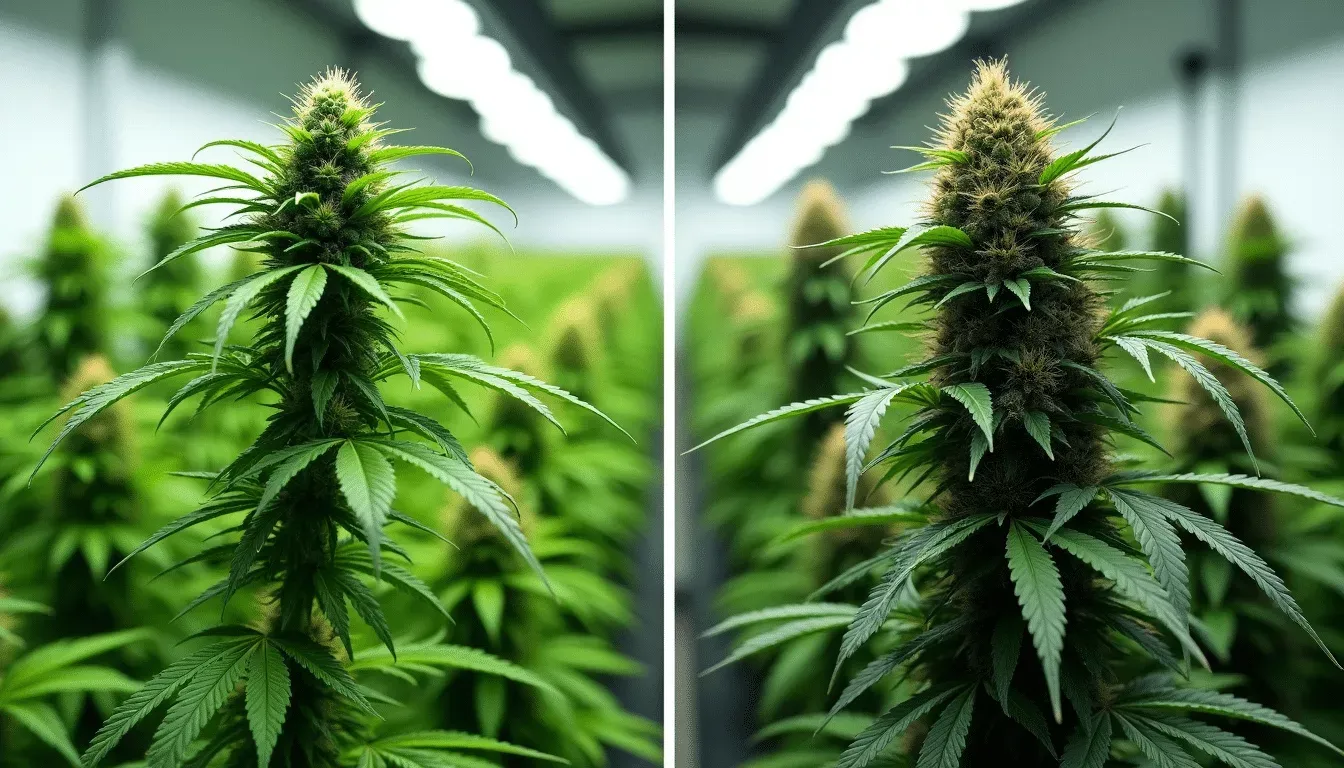
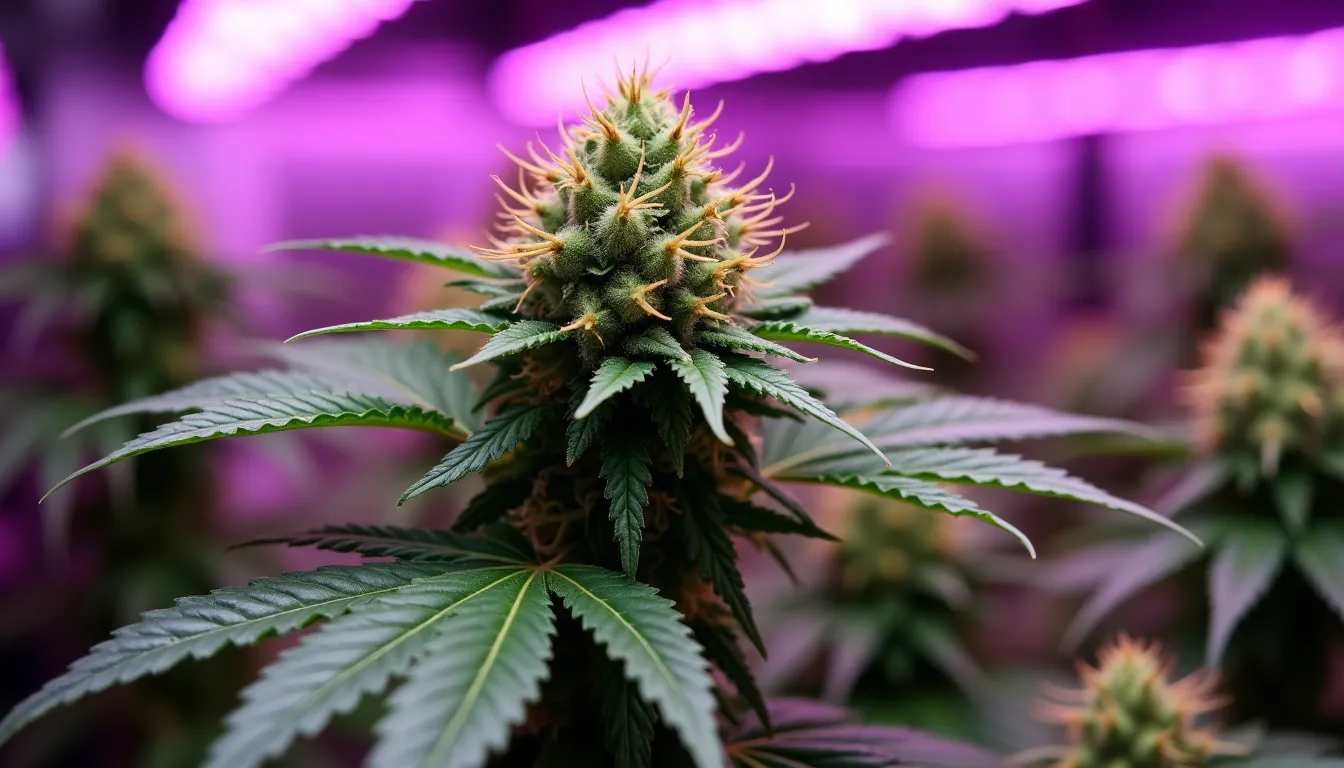
Visual cues that tell you exactly when to harvest
Cannabis plants show clear signs when they’re ready for harvest. You’ll notice the pistils (hair-like structures on buds) change from white to darker colors as they mature. The plant becomes ready for harvest when 60-70% of pistils turn brown, red, or orange. The fan leaves naturally turn yellow and drop off because the plant sends nutrients to the buds. Your buds should look dense and resinous, and feel sticky when you touch them gently.
The trichome inspection method
The best way to time your harvest is to check the trichomes. These tiny, crystal-like structures hold the plant’s cannabinoids and terpenes, which show true potency and maturity. You’ll need a jeweler’s loupe or USB microscope with at least 60x magnification to see them clearly.
Trichomes progress through three distinct stages:
- Clear/transparent: Immature, low potency
- Milky/cloudy white: Peak THC production, highest potency
- Amber/gold: THC degrading into CBN, more sedative effects
You should harvest when trichomes are mostly cloudy white with minimal amber to get maximum THC and energetic effects. A balanced effect comes from about 70% cloudy, 15% amber, and 15% clear trichomes. More relaxing, sedative effects require waiting until 30-50% of trichomes turn amber.
Post-harvest secrets that preserve potency
The way you handle your harvest substantially affects final quality. Damaged trichomes release their contents and lose valuable terpenes. Handle buds carefully and avoid touching them directly. Research shows that keeping stable vapor pressure, dewpoint, and temperature in controlled environments keeps trichomes intact better than traditional drying methods.
You can trim your harvest wet (right after cutting) or dry (after drying) based on your environment and humidity levels. The next step is slow drying at about 21°C (70°F) with 50% relative humidity for 2-7 days until stems snap instead of bend. This careful method preserves cannabinoids and terpenes that might be lost through poor handling.
Conclusion
Growing cannabis just needs attention to detail, but success comes from mastering fundamentals rather than chasing complexity. I’ve helped new growers over the last several years and seen firsthand that patience and observation matter more than expensive equipment or complicated feeding schedules.
The experience from seed to harvest teaches valuable lessons about plant care. Your confidence and understanding grow through each stage from germination through flowering. Cannabis naturally wants to grow. You just need to provide the simple needs: adequate light, proper nutrients, and consistent care.
Many first-time growers get satisfying results when they start small and learn from each grow cycle. My experience shows that focusing on one or two plants helps develop essential skills before scaling up. It also helps to keep detailed notes about your growing process, which creates a valuable reference for future harvests.
Trust the plant’s signals and avoid overcomplicating the process. Cannabis growing combines simple science with practical experience – each harvest improves your skills and deepens your connection to this remarkable plant. Even expert growers started as beginners and developed their expertise through trial and error.
Related: hemp seed oil benefits
Share this content: